Difference between revisions of "Tutorial/Basic"
| (2 intermediate revisions by the same user not shown) | |||
| Line 1: | Line 1: | ||
| + | [[File:Tutorial_basic_result_thumb.png|thumb|[[:File:Tutorial_Basic_Result.knot|The result of this tutorial]]]] | ||
==Introduction== | ==Introduction== | ||
| − | |||
| − | |||
| − | |||
| − | |||
| − | |||
| + | Here is presented the steps needed to create a simple square knot using Knotter. | ||
==Creating a base graph== | ==Creating a base graph== | ||
Latest revision as of 16:07, 7 June 2013
Introduction
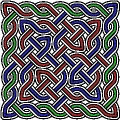
Here is presented the steps needed to create a simple square knot using Knotter.
Creating a base graph
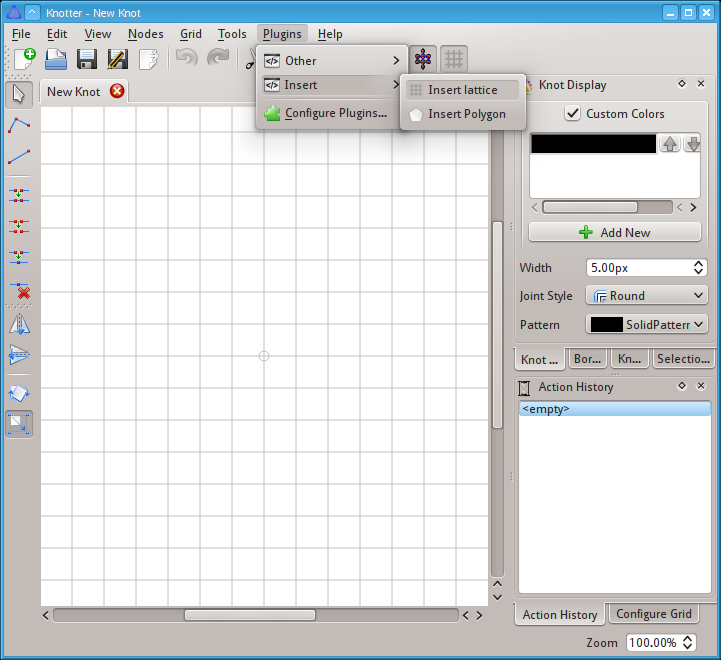
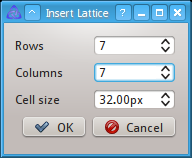
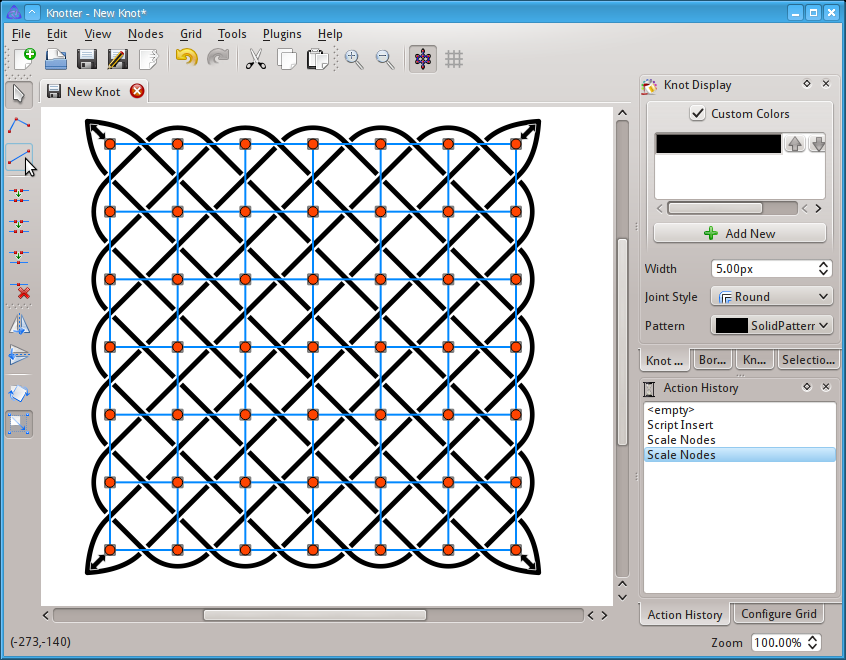
To start off with the base, we use Plugins → Insert → Insert Lattice to create a 7 x 7 square lattice.
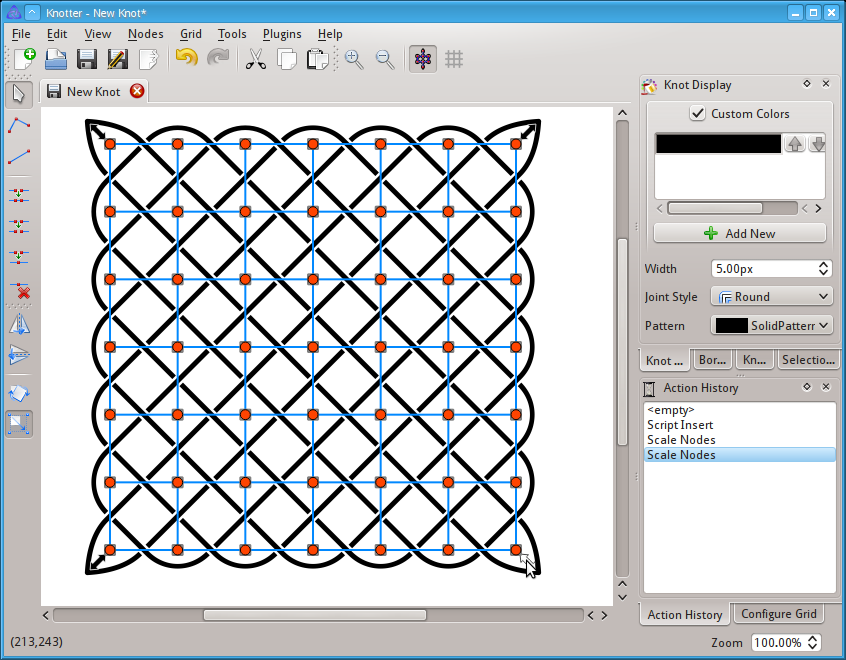
After clicking OK on the dialog, click somewhere near the top left corner of the drawing area to place the lattice.
Since that is all we need, you can disable the background grid with Grid → Enable Grid.
The nodes created by Insert Lattice are still selected so you can drag the bottom-right handle to make the lattice larger and fill the view.
Designing the knot
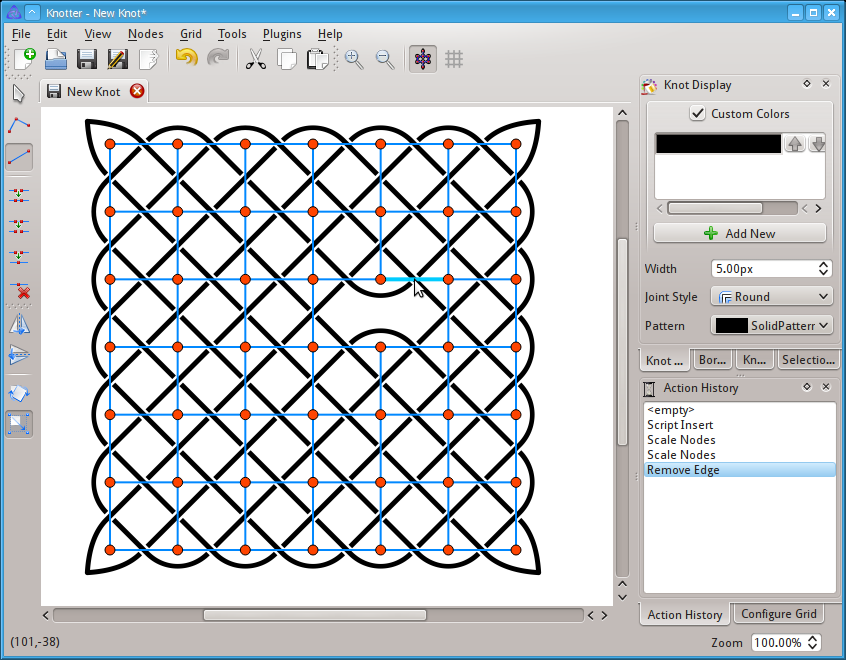
Now we switch to the Toggle Edge ![]() tool which is the best suited tool for our purpose. It allows to quickly toggle edges on and off.
tool which is the best suited tool for our purpose. It allows to quickly toggle edges on and off.
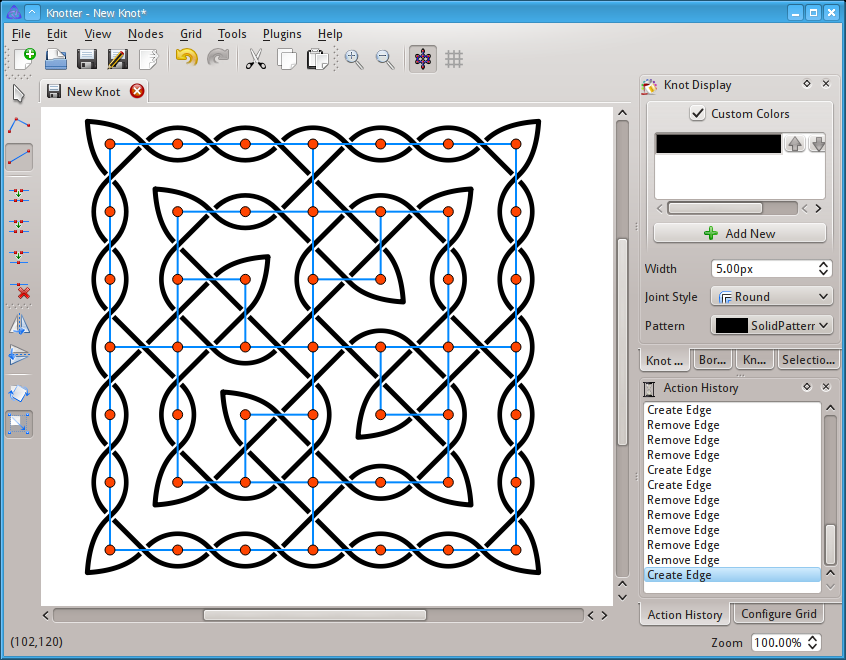
To proceed with the design click on the edges you want to remove. If you want to put it back, simply click again.
Continue until you find a design that you like.
Styling the Knot
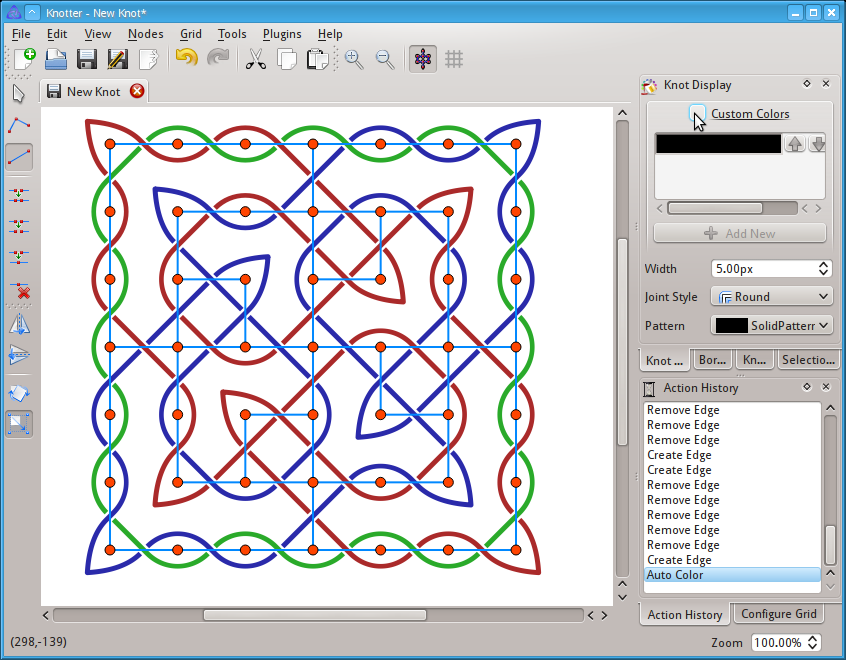
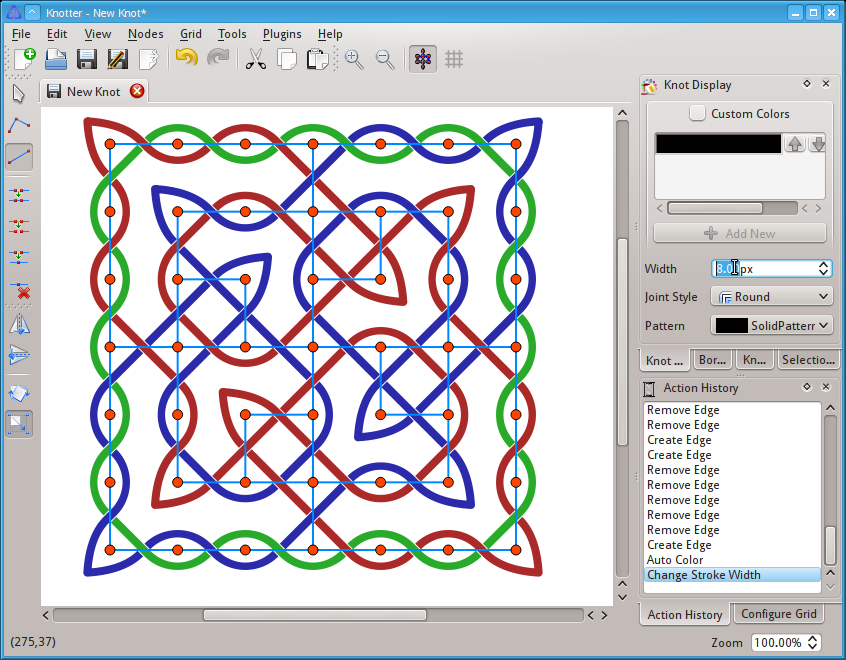
The fastest way to add colors to a knot is to disable custom colors. this will assign a different color to every rope of the knot. In this example the knot happens to be made up of three ropes, as such it has three colors.
Edits to the design can change the number of colors.
Now to make the knot more visible we set the width to 8 px.
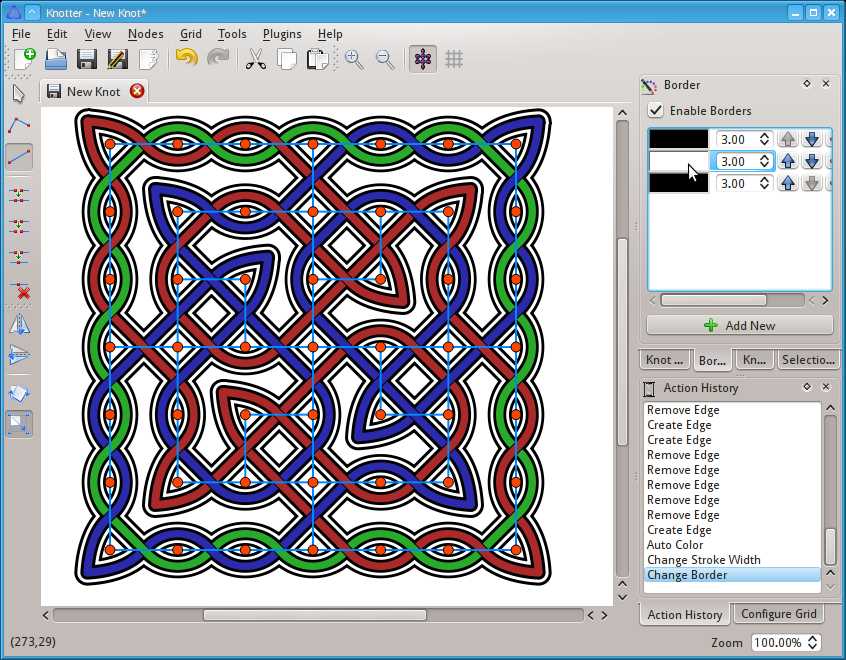
After that we add borders, here are two black borders and a white one between them. Each border is 3 pixels wide.
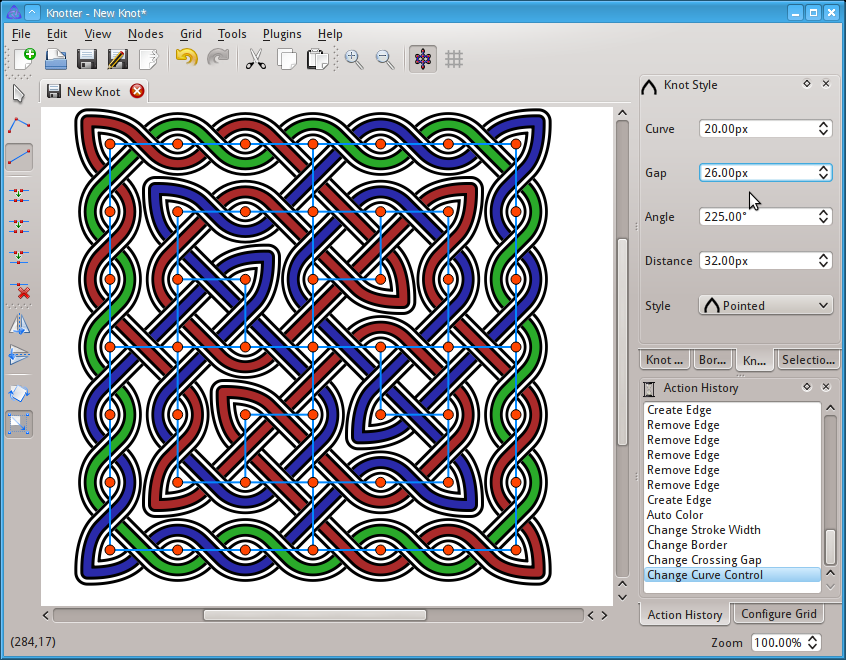
Now we change the Curve to 20 and the Gap to 26, to make it match the thickness of the knot.
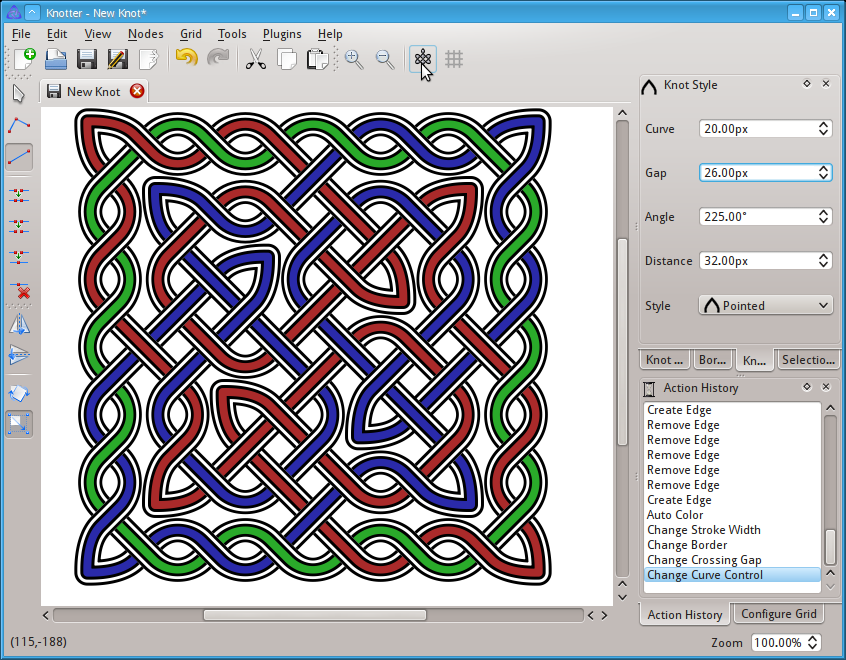
To better view the knot, you can toggle the graph overlay off.
